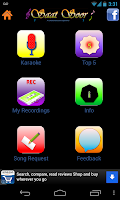
 There are various ways of monetizing an Android app. You can either charge a one time fee to users to install your app from Google Play, set up an in-app billing system to allow users to subscribe to services or publish your android application for free and make money through advertisements.
Monetizing an app through advertisements requires setting up your Android Eclipse project with required SDKs from respective ad network and embedding respective layout and code in your app.
I have explained each step of integrating Google Ad network or Admob in your Android application in following instructions.
Instructions
- Sign up for an account at Admob - http://www.admob.com
- Click "Add your first app" button and then click "Android app"
- Add the Android app information lile the url for your Android app, name and description
- Download latest version of Google Admob Ads SDK for Android to your computer and extract all contents
- Copy the GoogleAdMobAdsSDK jar file to your Android project's "libs" folder
- Open Eclipse IDE or restart Eclipse IDE if it is already open
- Right-click on your project, select "Properties". Navigate to "Java Build Path" option and add the Google AdMob Ads SDK jar file as a library
- Open a class file from your project and set the layout. In the following case, the layout file is main.xml:
package com.google.example.ads.xml;
import android.app.Activity;
import android.os.Bundle;
/**
* A simple {@link Activity} which embeds an AdView in its layout XML.
*/
public class BannerSample extends Activity {
/** Called when the activity is first created. */
@Override
public void onCreate(Bundle savedInstanceState) {
super.onCreate(savedInstanceState);
setContentView(R.layout.main);
}
} - Open main.xml layout file and paste the following code. Make sure the following line is present in your LinearLayout header: xmlns:ads="http://schemas.android.com/apk/lib/com.google.ads" :
<?xml version="1.0" encoding="utf-8"?>
<LinearLayout xmlns:android="http://schemas.android.com/apk/res/android"
xmlns:ads="http://schemas.android.com/apk/lib/com.google.ads"
android:orientation="vertical"
android:layout_width="fill_parent"
android:layout_height="fill_parent">
<TextView android:layout_width="fill_parent"
android:layout_height="wrap_content"
android:text="@string/hello"/>
<com.google.ads.AdView android:id="@+id/ad"
android:layout_width="wrap_content"
android:layout_height="wrap_content"
ads:adSize="BANNER"
ads:adUnitId="AD_UNIT_ID_GOES_HERE"
ads:testDevices="TEST_EMULATOR,TEST_DEVICE_ID_GOES_HERE"
ads:loadAdOnCreate="true"/>
</LinearLayout> - You can find your AD_UNIT_ID from your Google AdMob account
- Remove the line "ads:testDevices" before launching your app in Google Play. This feature should only be used if you are testing your app in an android emulator
- Finally add the following lines to your Android Manifest file:
android:configChanges="keyboard|keyboardHidden|orientation|screenLayout|uiMode|screenSize|smallestScreenSize"
/>
No comments:
Post a Comment